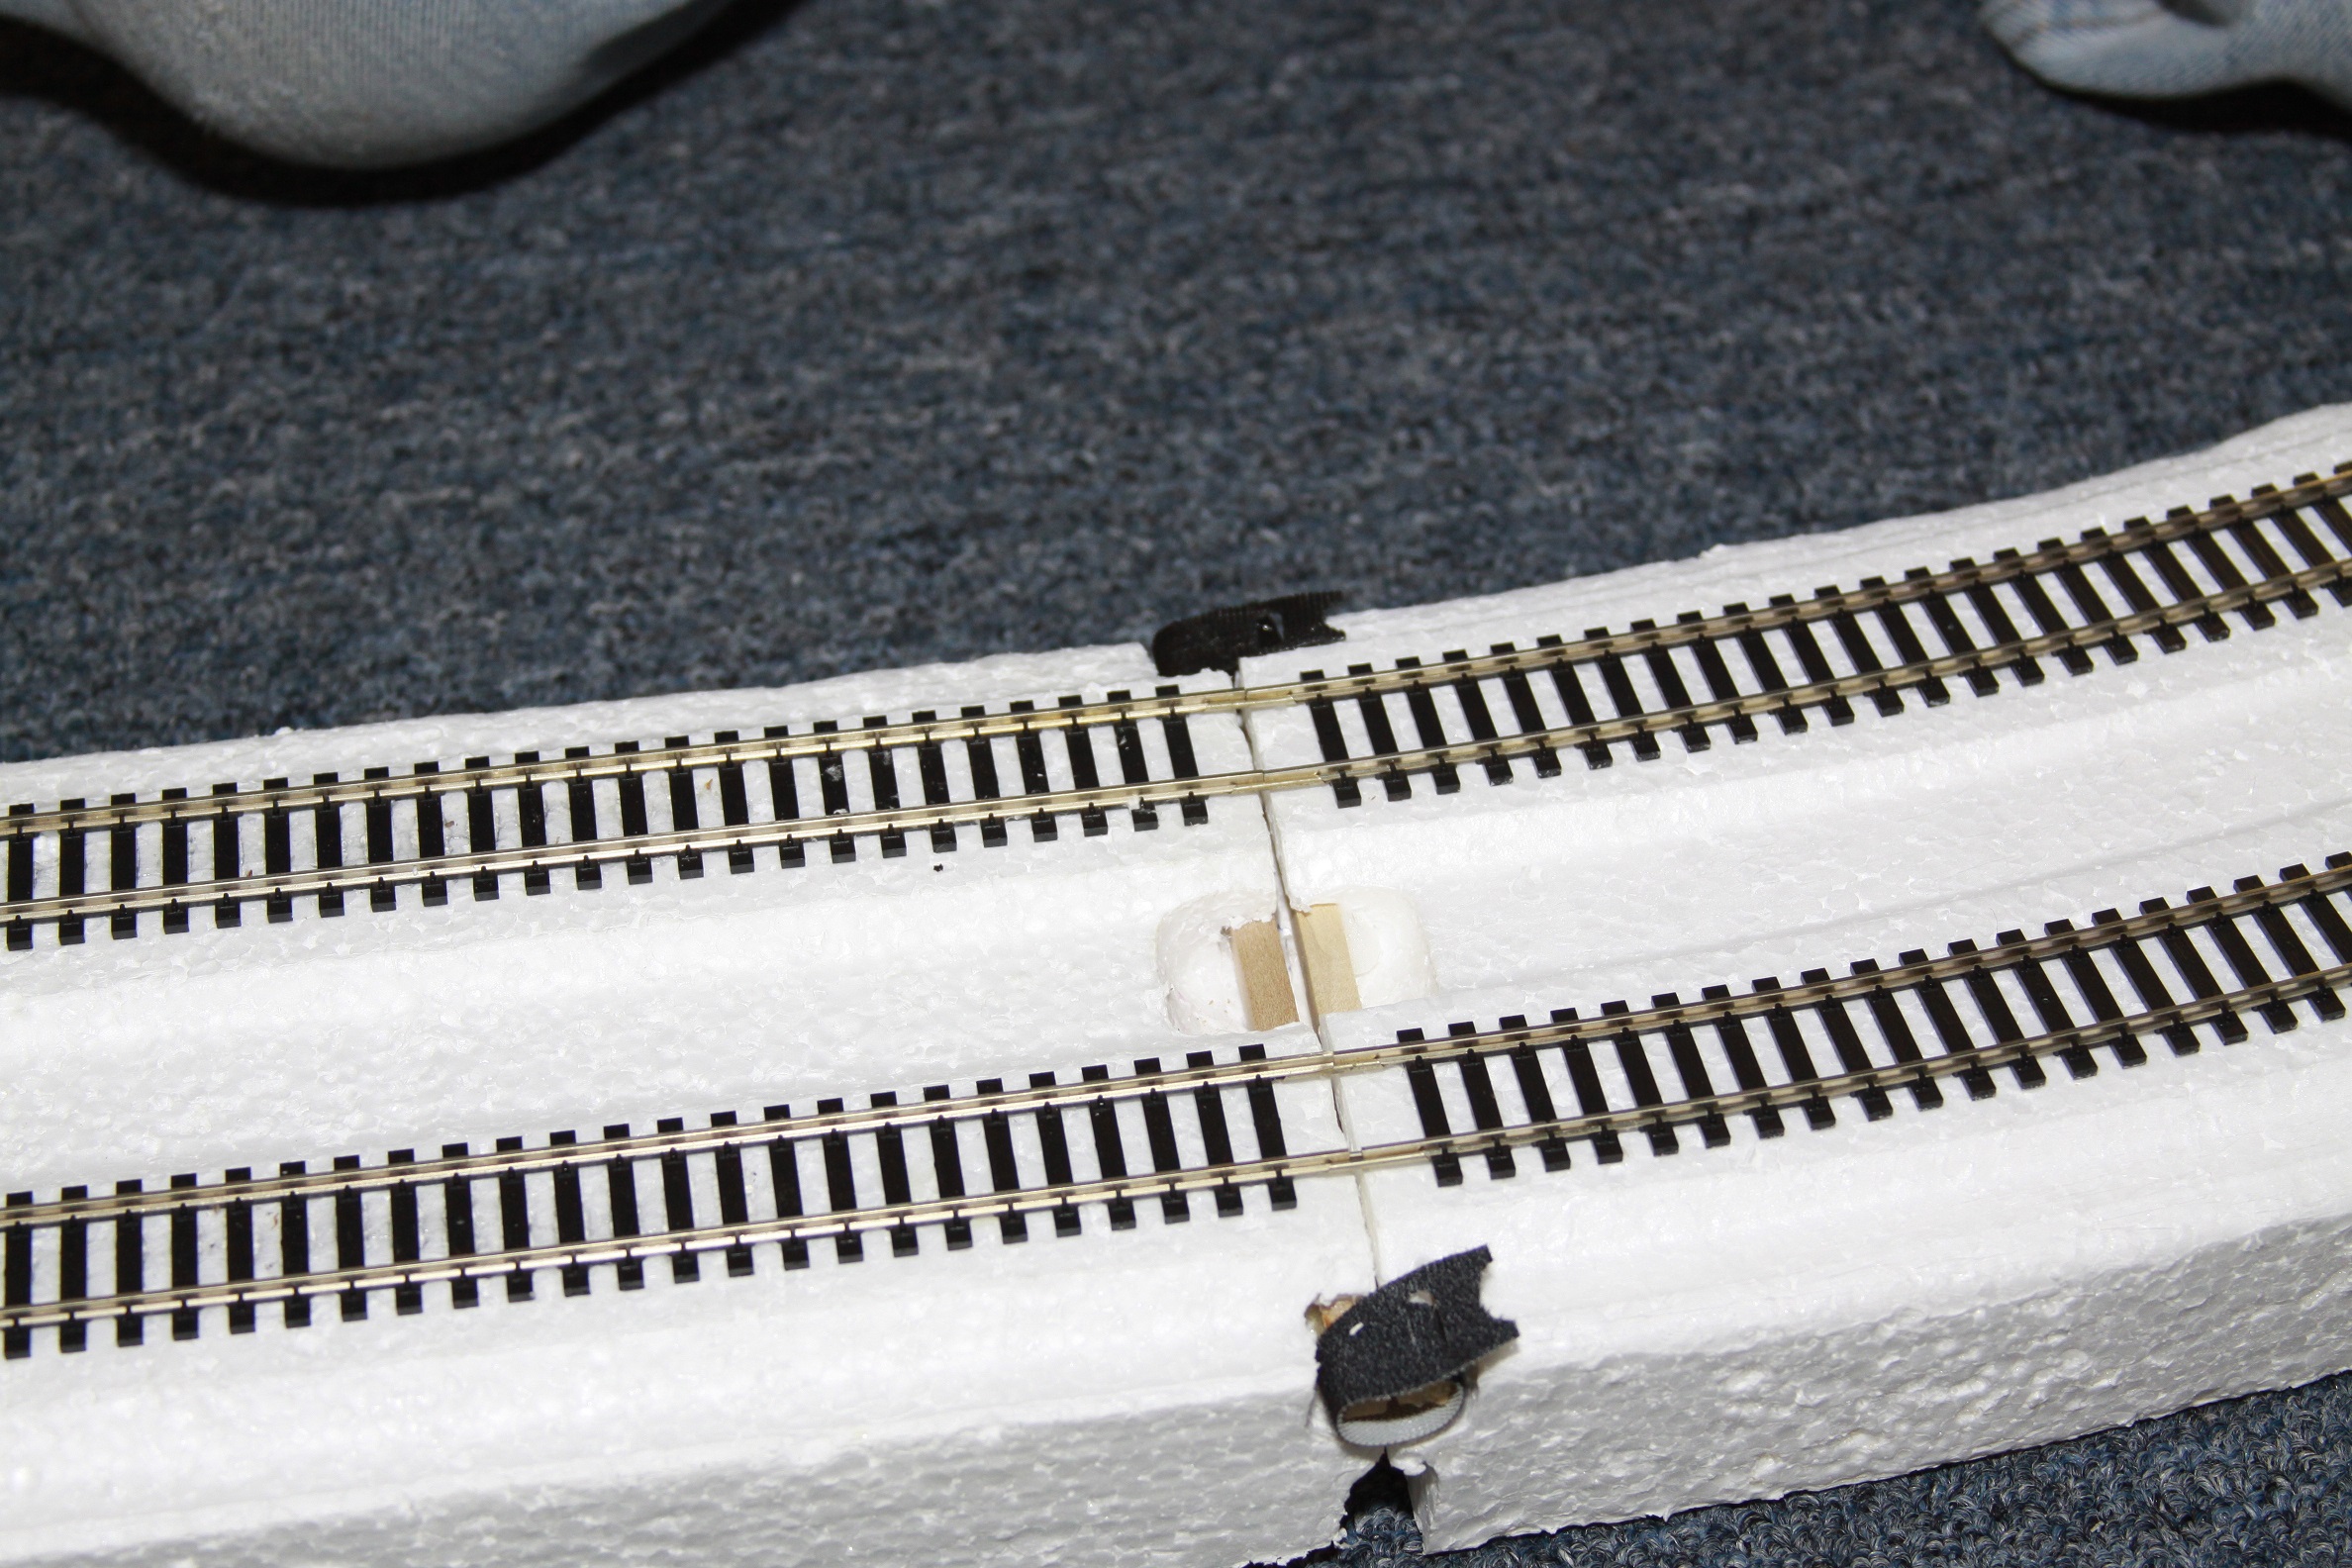
Assembling August Track is similar to putting together any other HO track pieces. Each track has 2 rails and there are 2 track on each board. The rails are joined with standard rail joiners. There is also a bus wire that must be connected before joining the rails. The ends of the rails have been modified to make track joining as easy as possible. The bottom or foot of the rail has been ground to a point to guide the rail join on. The inside of the top or head of the rail has be ground to help prevent derailments at track joins.
Before You Start
Parts:
2 Parts are needed to join boards;
4 rail joiners
2 Velcro straps
Tools
A small flat head screw driver. (Any small metal tool will do; needle nose pliers, a scrap piece of rail, metal ruler, ect.)
Joining Boards
Step 1: Add rail joiners to 2 rails on one side of the board. Push the joins ¾ of the way in. Attach the rail joiners so that the tight end is connected to the rail and the looser open end faces out. If neither end of the rail joiner is tight see “How to Tighten Rail Joiners” below.

Step 2: On the same end of the board, add two trail joiners to the other track. Only push the rail joiners about ½ way in.
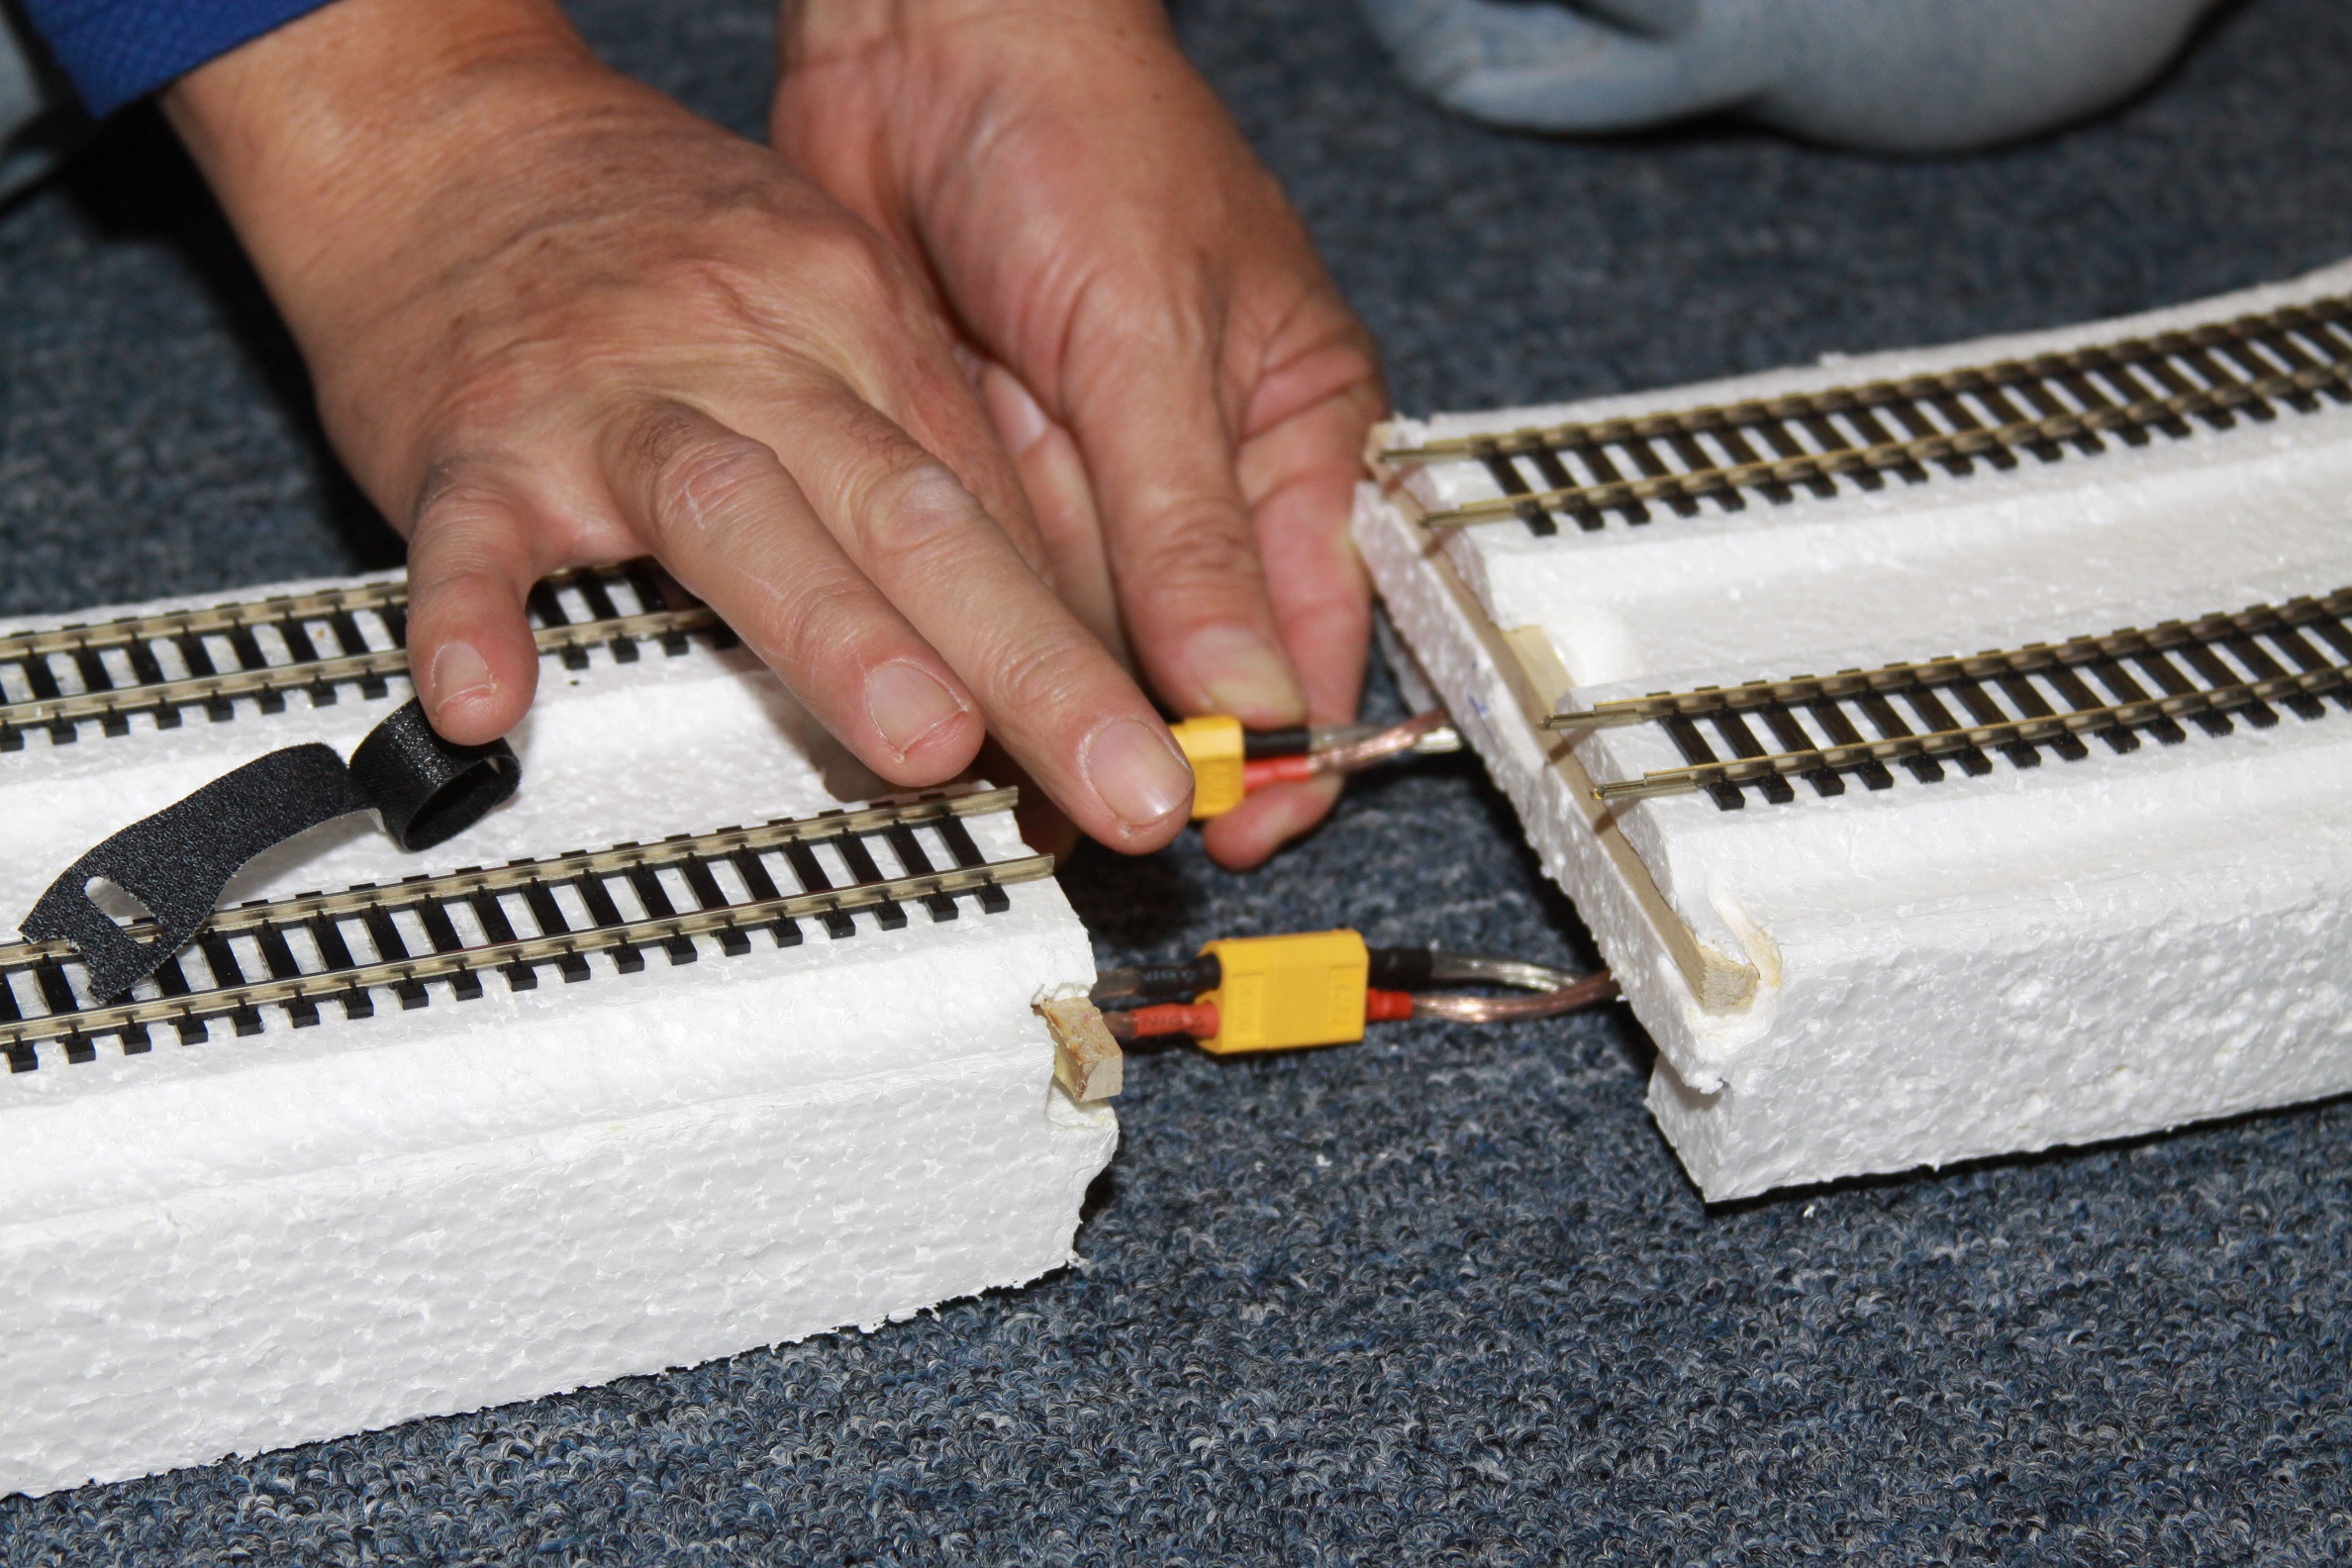
Step 3: Connect the bus wires. The wire can only be connected one way so you cannot do it wrong. As you bring to sections of track together, cross the wires so that they fold under the foam.
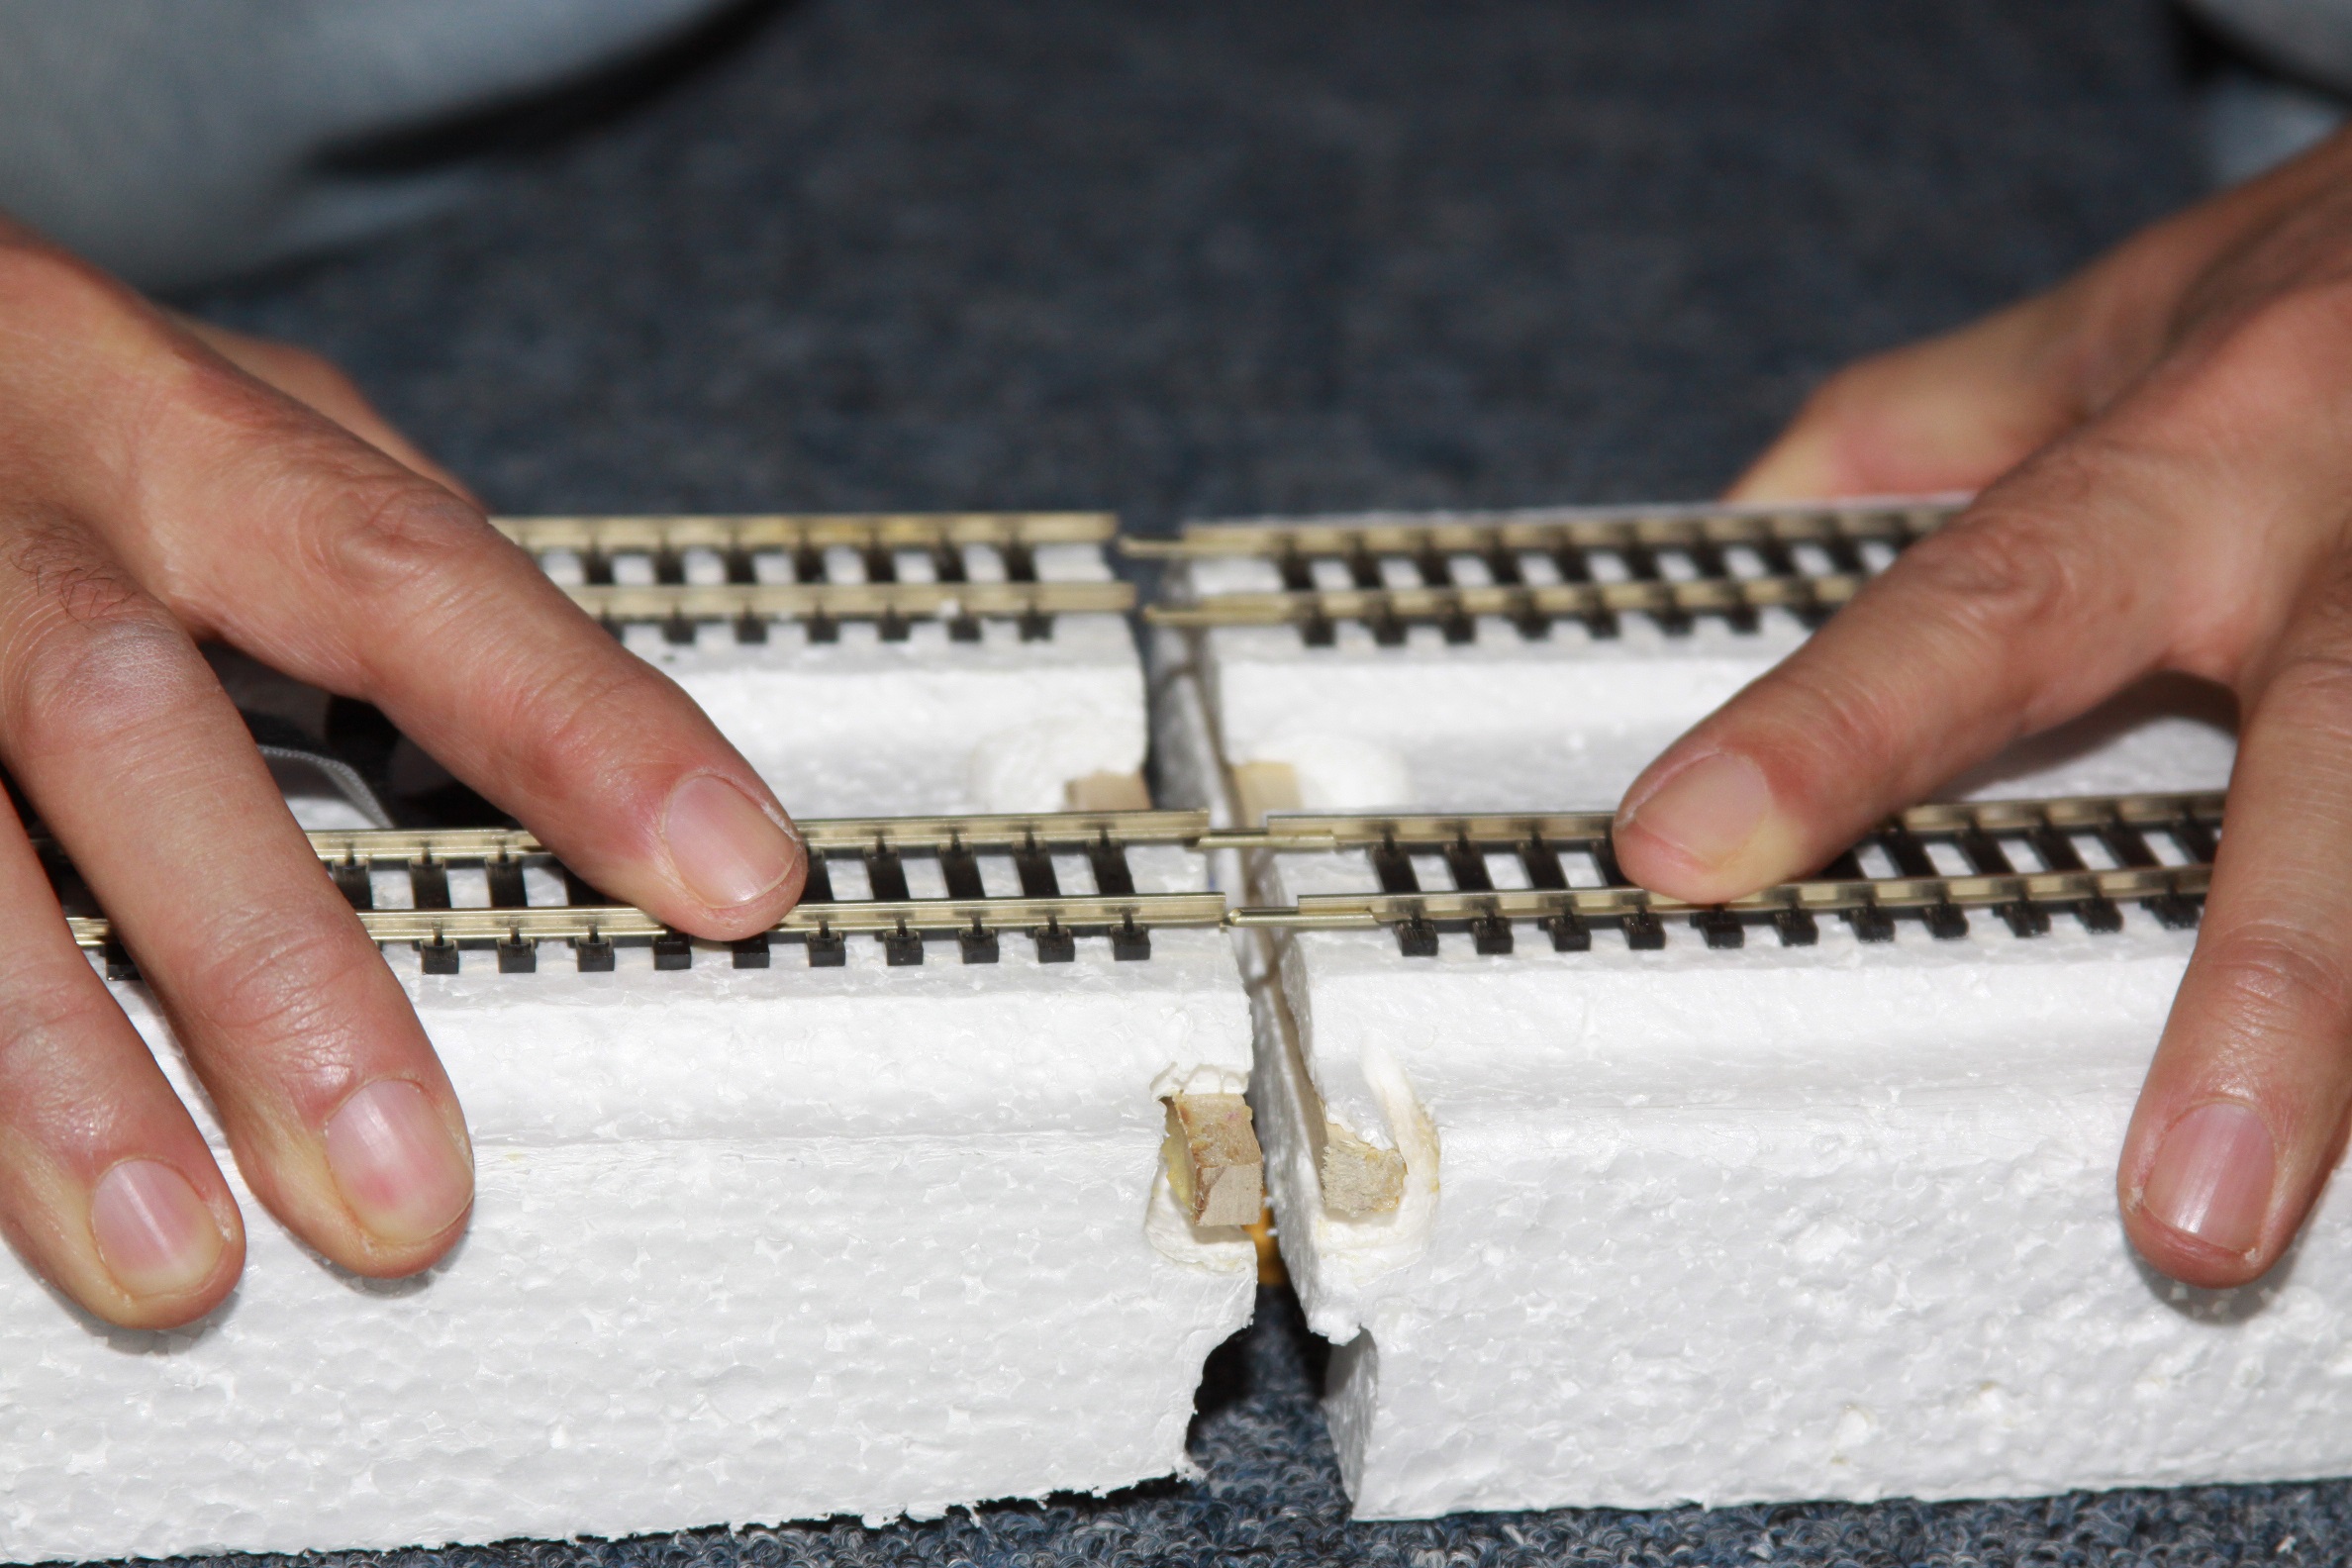
Step 4: As you bring the boards together connect the rails where the rail joiners are ½ way in first and then the rails with the joiners ¾ of the way in second. It is easier to join one track at a time rather than both rails at the same time.
Step 5: Use the Velcro straps to secure the boards together.
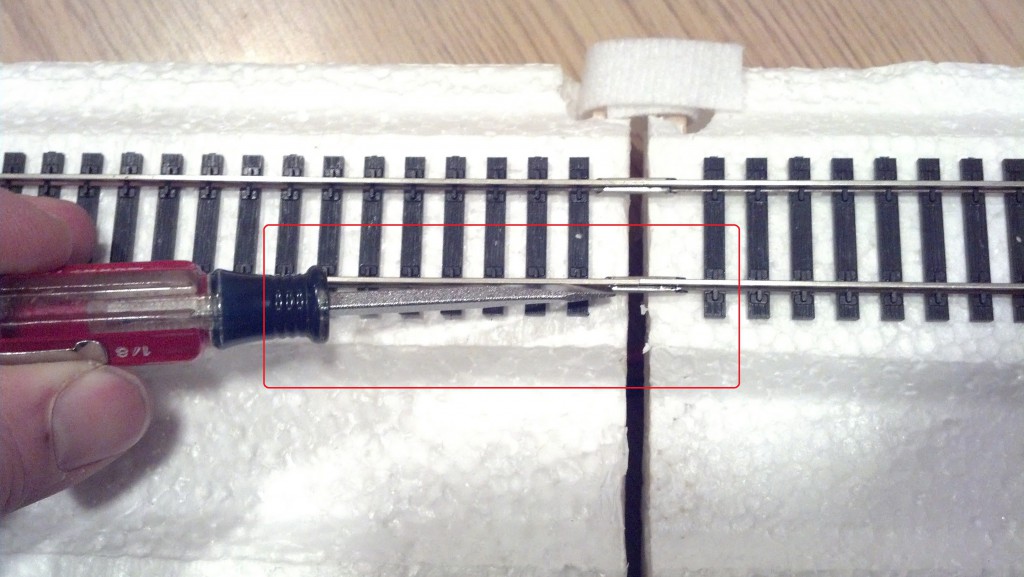
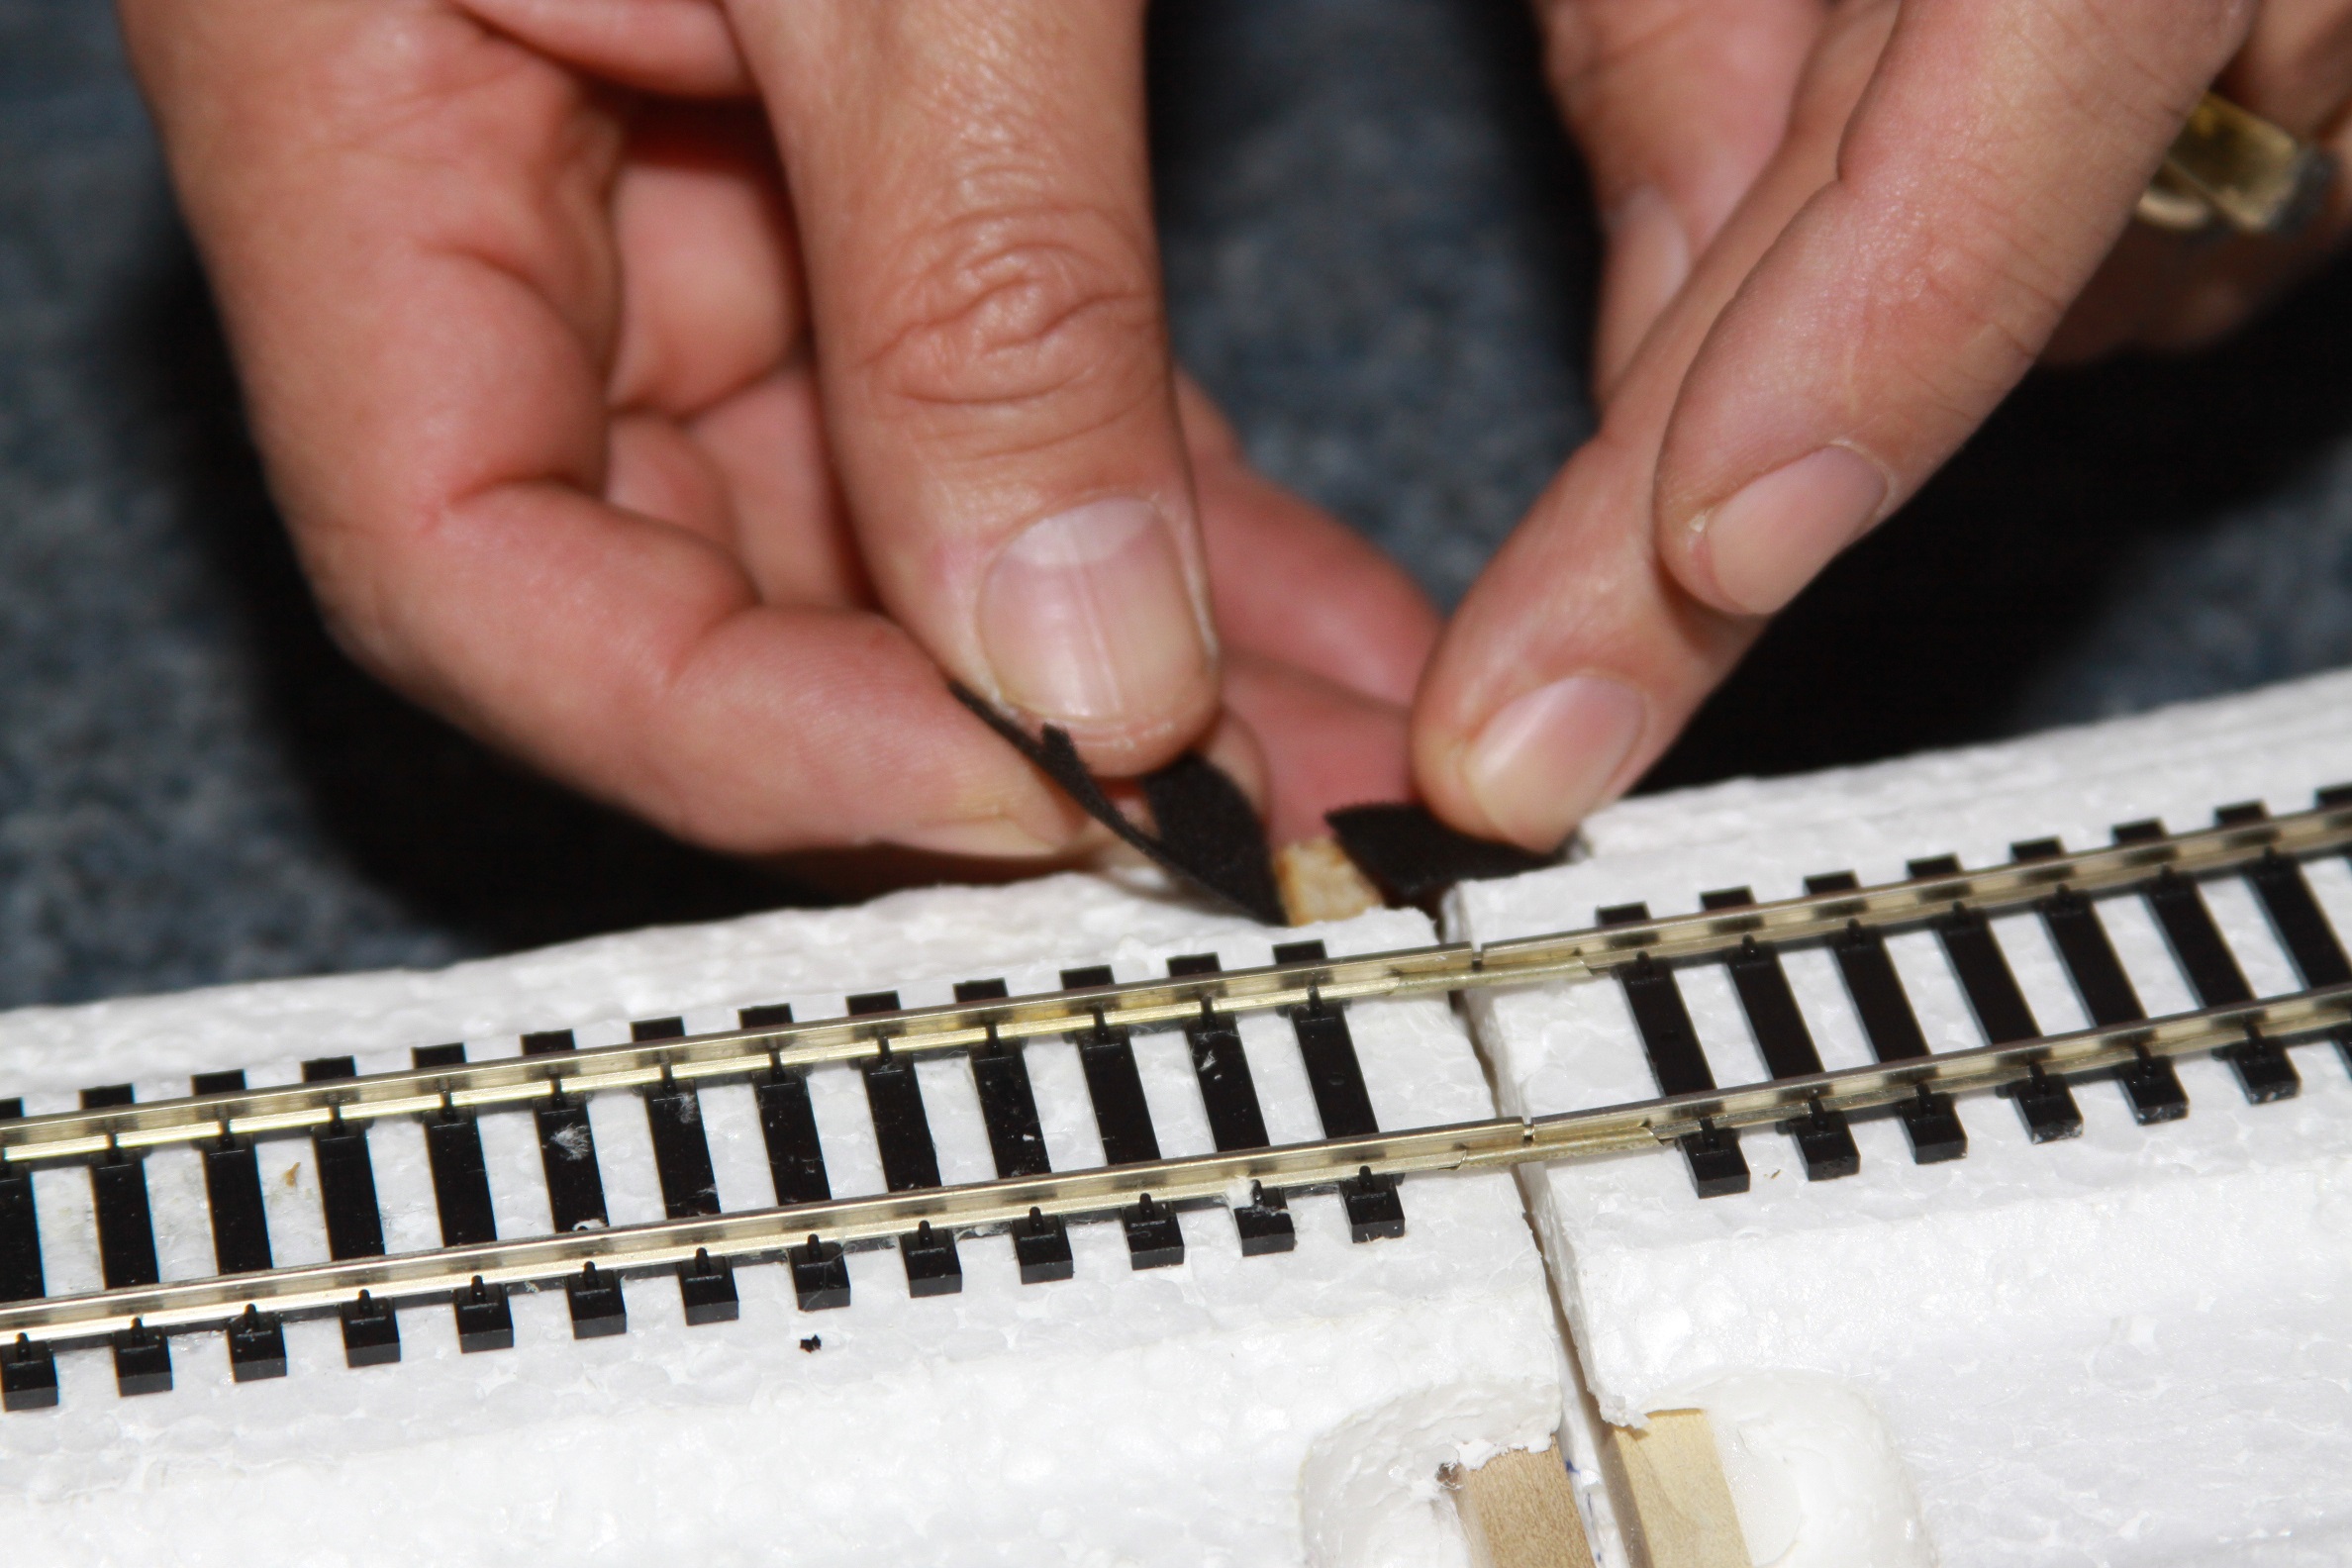
Step 6: Use the small screw driver to push the rail joiners ½ way over both joints.
How to Tighten Rail Joiners
Augusta Track uses standard rail joins that are used on most HO tracks. It is common for the rail joins to become loose after usage. To tighten the rail joiner so it does not slide on the rail, hold the joiner at the base of a needle nose pliers as shown below. Gently squeeze the pliers to push the sides of the rail joiner together. Do NOT over tighten or you will not be able to put them back on the rail.
How To Make New Rail Joiners
We prepare each rail joiner to make it as easy as possible to join the tracks. You can use standard rail joins without preparation, but it will make it more difficult to join the tracks.
- Hold the rail joiner with standard pliers so that only about ¼ of the rail joiner is exposed.
- Using a scrap piece of track, insert it into the exposed rail joiner and move it left and right and up and down while hold the pliers tight so that only the tip of the rail joiner is stretched.
- Use needle nose pliers to bend the tip of the joiner down.
- Use a fine point marker to make the flanged or stretched end.